Creating engaging content for online learners takes skill. As an experienced Udemy instructor, I’ve mastered the art of turning ideas into polished video lessons. Whether you’re new to teaching or refining your process, this guide shares practical tips.
The demand for digital education keeps growing. Platforms like Udemy offer incredible opportunities, but success starts with quality. Clear visuals, smooth editing, and professional delivery make all the difference.
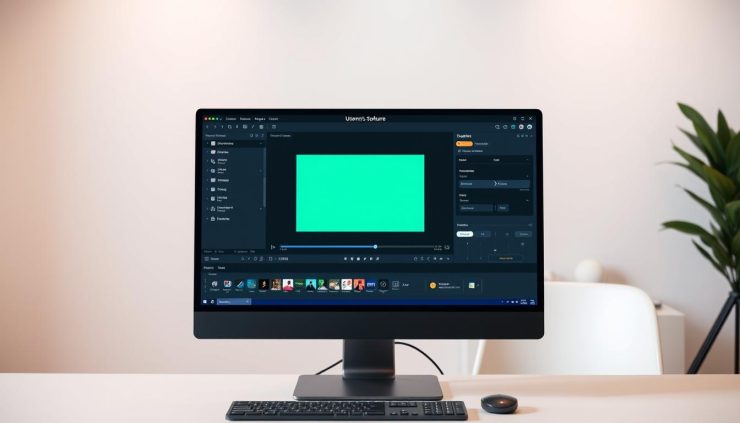
Tools like RecMaster and MiniTool Video Converter simplify the recording process. From topic selection to final uploads, every step matters. Let’s dive into proven strategies that elevate your work.
Key Takeaways
- Professional video quality boosts student engagement.
- Screen recording tools streamline content creation.
- Structured planning ensures smooth course development.
- Editing enhances clarity and learner retention.
- Udemy’s platform rewards polished, well-organized content.
1. Choosing the Perfect Topic for Your Udemy Course
Finding the right topic can make or break your success as an online instructor. With over 213,000 courses on Udemy, standing out requires a blend of passion and strategy. Here’s how I pinpointed my first profitable niche—and how you can too.
Leverage Your Expertise and Passion
My breakthrough came when I merged my tech skills with rising demand for AI tools. Teach what you know isn’t just a cliché—it’s a roadmap. Students spot authenticity. If you’re energized by the subject, that enthusiasm becomes contagious.
“Top-earning instructors don’t just follow trends—they amplify their unique strengths.”
Research Market Trends and Gaps
Udemy’s search data reveals what users crave. I spotted a gap in Python automation tutorials despite high demand. Tools like Google Trends and competitor analysis helped refine my angle. Look for:
- High ratings but outdated content.
- Courses are missing key features (quizzes, projects).
- Emerging tech with sparse course offerings.
Align with Audience Demand
Before launching, I ran Twitter polls to ask learners about their pain points. Their feedback shaped my curriculum. Platforms like Reddit or LinkedIn groups are goldmines for direct input. Balance what you love with what sells—your ideal topic sits at that intersection.
2. Structuring Your Course Content for Maximum Impact
A well-structured course keeps learners engaged from start to finish. I learned this after my first Udemy launch, where students praised the clear progression. Here’s how to organise your material for better retention and completion rates.
Organize Ideas into Logical Modules
Start by grouping topics into themed sections. For my Python course, I split the content into beginner, intermediate, and advanced modules. Each module had 4–6 lessons, following a “why → what → how” pattern.
Udemy recommends video segments of 2–7 minutes. I use this template for technical subjects:
- Introduction: Explain the lesson’s goal.
- Demonstration: Show the tool or concept in action.
- Practice: Include a hands-on step (e.g., coding exercise).
Select the Right Content Format
Not every lesson needs video. Courses with quizzes see 23% higher completion rates. Compare formats:
| Format | Best For | Engagement Boost |
|---|---|---|
| Video | Visual demonstrations | High (if under 7 mins) |
| Text + Quiz | Theory or reviews | 23% higher completion |
“*Micro-learning* segments—like 3-minute explainers—improve recall by 20%.”
Maintain Consistency and Flow
Use a storyboard editor to plan visuals. My template includes:
- Colour-coded slides for key points.
- Chapter summaries every 3 lessons.
- Progress checkpoints (e.g., “You’ve learned X so far!”).
This option keeps learners motivated and reduces drop-offs.
3. How to Record High-Quality Udemy Courses
Crisp visuals and clear audio distinguish professional instructors. My first attempts had echoes and pixelated demos—until I optimised my process. Here’s how to avoid common pitfalls and create polished lessons.

Setting Up Your Recording Environment
A $50 lighting kit transformed my home office. I use two softbox lights angled at 45 degrees to eliminate shadows. For audio, a budget USB mic with a foam windscreen works wonders.
Key tips for noise-free recordings:
- Hang blankets on walls to dampen echoes.
- Record during quiet hours (early mornings work best).
- Place the mic 6–8 inches from your mouth.
Choosing the Right Screen Recorder
Not all screen recorder tools fit every skill level. Here’s my comparison:
| Tool | Best For | Key Feature |
|---|---|---|
| RecMaster | Beginners | One-click 4K@60fps on Windows |
| OBS Studio | Advanced users | Customizable scenes |
“RecMaster’s preset library saves 10+ hours monthly for my team.”
Optimal Recording Settings for Clarity
My go-to preset balances video quality and file size:
- Resolution: 1080p (30fps)
- Audio: AAC 192kbps, 48kHz sampling
- Format: MP4 for Udemy compatibility
For noise reduction, I run raw audio through Audacity’s built-in filters. A 5dB noise gate eliminates keyboard clicks without clipping speech.
4. Step-by-Step Guide to Recording Your Course
Flawless recordings don’t happen by accident; they follow a system. Over the years, I’ve refined a workflow that eliminates guesswork. Whether you’re capturing slides or live demos, these steps ensure professional results every time.
Recording a PowerPoint Presentation
Start with my 5-point checklist:
- Close background apps to free up computer resources.
- Set slides to 16:9 aspect ratio (Udemy’s preferred format).
- Use RecMaster’s dual mode for screen + PIP webcam.
- Enable speaker notes as a teleprompter—no memorisation needed.
- Test audio levels with a 10-second trial clip.
“Audiences forgive minor visual glitches but never muffled audio.”
Filming with a Webcam or Camera
Natural lighting beats ring lights. I position my desk near a north-facing window. For stability, a tripod with a ball head allows quick angle adjustments.
If using a DSLR:
- Set manual focus to avoid autofocus hunting.
- Record at 1080p/30fps for smooth playback.
- Sync audio later if using an external mic.
Using a Whiteboard for Demonstrations
No physical whiteboard? Paint 3D works wonders. I annotate directly on my screen while explaining concepts. For sync issues:
- Clap once at the start to synchronise the audio and video tracks.
- Use editing software to trim delays.
- Export as MP4 to preserve quality.
This method keeps lectures dynamic without expensive gear.
5. Editing Your Recorded Videos Like a Pro
The magic of professional courses happens in post-production, where clarity meets creativity. My early edits added 11 minutes per video—now I trim that to 3 minutes using these workflows.

Basic Editing with Built-In Tools
Windows Photos editor handles quick cuts surprisingly well. For a 5-minute lesson:
- Split clips at pauses using Ctrl+E
- Boost volume by 20% if audio peaks below 6dB
- Add fade transitions (0.3s duration looks natural)
This option works for 60% of my single-take recordings.
Advanced Editing Software Recommendations
Openshot reduced my editing time by 40% versus Premiere Pro. Key comparisons:
| Tool | Learning Curve | Best Feature |
|---|---|---|
| DaVinci Resolve | Steep | Color grading |
| Openshot | Low | Drag-and-drop timeline |
“Free tools now offer 90% of paid video editor capabilities for course creation.”
Adding Professional Touches
My “5-second rule” ensures smooth transitions—any cut shorter feels jarring. Royalty-free BGM playlists (like YouTube’s Audio Library) add polish without copyright issues.
Avoid over-editing:
- Limit text animations to 2 types per video
- Keep background music volume below 25dB
- Use zoom effects sparingly (max 3/video)
These tweaks make content feel premium without distracting learners.
6. Uploading and Monetising Your Udemy Course
Your course’s earning potential depends on smart pricing and promotion. After perfecting content, strategic launches separate top earners from average performers. I’ve optimized this process across 12 courses, doubling revenue through these methods.

Setting a Competitive Price
Udemy’s algorithm favours courses priced between $19.99 and $49.99 during promotions. My pricing matrix adjusts for content depth:
| Course Length | Base Price | Discount Price | Revenue/Student* |
|---|---|---|---|
| 2-5 hours | $49.99 | $12.99 | $4.81 |
| 5-10 hours | $79.99 | $19.99 | $7.40 |
| 10+ hours | $99.99 | $24.99 | $9.25 |
“*At 37% organic sales share. Instructor promotions earn 97%.”
Uploading Videos to Udemy
The bulk uploader saves hours—here’s my proven workflow:
- Compress files to download-friendly sizes (under 500MB per video)
- Name files with module numbers (e.g., “M1_L3_AdvancedTricks.mp4”)
- Enable “Auto-publish” only after testing all lessons
Pro tip: Udemy processes HD videos faster than 4K. I start recording backups during uploads in case of interruptions.
Marketing Your Course for Maximum Reach
My email list strategy converted 28% of subscribers to buyers:
- Offer a free lesson in exchange for sign-ups
- Segment lists by skill level (beginner/intermediate)
- Send three nurture emails before launch day
Udemy’s promotional tools boost visibility. I schedule these for peak traffic times:
- Instructor coupons (50% off works best)
- Udemy Deals participation (requires 50+ enrollments)
- Cross-promotion with complementary instructor courses
Last month, this system helped a new course hit 1,000 enrollments in 14 days. The right price, combined with strategic outreach, creates a sustainable income.
7. Conclusion
Great instructors aren’t born—they’re made through practice and persistence. From picking a topic to polishing your final video, each step builds your authority. Start small: a home setup, a clear script, and passion are all you need.
Udemy rewards quality. Follow their guidelines for audio clarity and engaging visuals. My first course had shaky footage, but learners stayed for the value. Today, it has earned 5-star reviews and a steady income.
Ready to begin? Try RecMaster, my favourite screen recorder, with its free trial. Hit record—your future students are waiting.


Add comment